Bild von unserem Modell generiert.
helmets
Cycling Helmet Replacement: When to Replace Your Bike Helmet
A practical guide to cycling helmet replacement after crashes, aging, poor fit, visible damage, and uncertain helmet history.
Why helmet replacement is a performance and safety decision
Cycling helmet replacement is easy to treat as an afterthought because a helmet does not wear out as visibly as tyres, chains, or brake pads. That is the wrong frame. A helmet is safety equipment first, but it also affects how well you ride because fit, ventilation, and stability shape comfort and distraction. A helmet that moves around, traps heat poorly for your conditions, or needs constant adjustment is not just annoying. It pulls attention away from the road, the group, and the effort.
The important detail is that helmets are not built like frames or wheels. You do not inspect one, decide it is mostly fine, and keep riding because it still looks straight. The foam liner is designed to deform under load. That deformation can be obvious, but it can also be hidden under the shell or concentrated in one small area. Once the structure has done its job, you should assume it has less capacity to do it again.
This is where data-driven riders can make a better decision than simply asking whether the helmet looks acceptable. Treat the helmet like a critical component with a service history. Note crashes. Track age. Check fit. Inspect the retention system. If the answer is uncertain after an impact, uncertainty should push you toward replacement, not toward wishful thinking.
Replace immediately after these crash or impact signs
A crashed cycling helmet should be replaced when it has taken a meaningful impact, even if the damage is subtle. The sharper rule is this: if the helmet contacted a hard surface, was on your head during a crash where contact cannot be ruled out, or fits differently afterward, retire it.
The reason is simple. The external shell can rebound or hide damage while the internal foam has already compressed. A helmet can look acceptable from the outside and still have lost part of the structure that makes it protective.
Replace the helmet immediately if you see any of the following:
- Cracks in the outer shell or inner foam
- Dents, flat spots, or crushed areas in the foam liner
- Separation between the shell and foam
- A retention system that no longer tightens evenly
- Straps that are torn, stretched, cut, or pulled from their anchor points
- Buckles that stick, slip, or no longer lock positively
- A helmet that hit the ground, a vehicle, a wall, or another hard object during a crash
- A helmet that now fits differently after an impact
The last point matters more than riders think. If a helmet sits differently after a crash, that is not just a comfort issue. It can mean the shell, liner, retention cradle, or strap geometry has changed. A helmet that rotates, tips back, or slides forward is not positioned to do its job when the next impact arrives.
Also replace it if you cannot confidently reconstruct what happened. After a hard fall, memory is not always reliable. If the helmet was on your head and there is evidence that you went down, do not build the decision around whether you remember the exact point of contact.
Age, UV, sweat and storage: how helmets degrade over time
Bike helmet lifespan is not only about crashes. A helmet lives in sun, heat, sweat, rain, transport bags, garage shelves, and car boots. Over time, those conditions can degrade the materials that make the helmet fit securely and absorb impact.
The foam liner is the core protective structure, but the smaller parts matter too. Straps can become stiff or fuzzy. Buckles can get gritty or lose their crisp engagement. Pads can compress until the helmet sits lower or looser than intended. The retention dial can develop play. The shell can fade, craze, or lift at the edges. None of these issues needs to look dramatic to matter.
UV exposure is especially relevant for riders who train outdoors year-round. Heat is another quiet problem. Storing a helmet in a hot car, near a heater, or in a place where it is repeatedly cooked and cooled is not the same as storing it in a dry, shaded room. Sweat adds another layer because salt can work into straps, pads, buckles, and the retention mechanism.
There is no single universal replacement interval that should override the manufacturer’s guidance for your model. Check the helmet label and manual, then use that guidance as the starting point. If the helmet has lived a hard life, age should weigh more heavily. If you do not know the helmet’s history, as with a used helmet, that uncertainty is part of the risk.
For a data-driven athlete, the practical move is to log the purchase date and treat the helmet like other equipment with a known service window. If you would not race on unknown carbon bars with a mystery crash history, do not put the same trust in a helmet with one.
Fit check: straps, retention systems and shell movement
A bike helmet fit check is not just about whether the size label matches your head. A good helmet should feel stable before you tighten it excessively. If it only stays in place because the retention dial is clamped down hard, the shape may be wrong for you.
Start with the shell position. The helmet should sit level, covering the front of the head without tipping back. If it leaves the forehead exposed, it is already compromised. If it sits so low that it blocks vision, it is either the wrong shape, wrong size, or incorrectly adjusted.
Next, check shell movement. With the straps fastened and the retention system adjusted, gently move the helmet forward, backward, and side to side. Your scalp should move with it. If the helmet slides independently, it is too loose, poorly shaped for your head, or the pads and cradle are no longer supporting it.
Then check the straps. The side straps should frame the ear without twisting. The chin strap should sit snugly without forcing your mouth shut. The buckle should close cleanly and sit comfortably away from pressure points. A strap that slowly loosens during rides is not a minor annoyance. It means the helmet may not stay where it needs to be in a crash.
Finally, check the retention system. The dial or adjustment mechanism should tighten evenly and release predictably. If it skips, jams, or has dead spots, the fit can change mid-ride. That is especially relevant on rough roads, gravel, or during long descents, where small fit problems become bigger as fatigue and vibration accumulate.
How to inspect foam, shell, buckles and pads properly
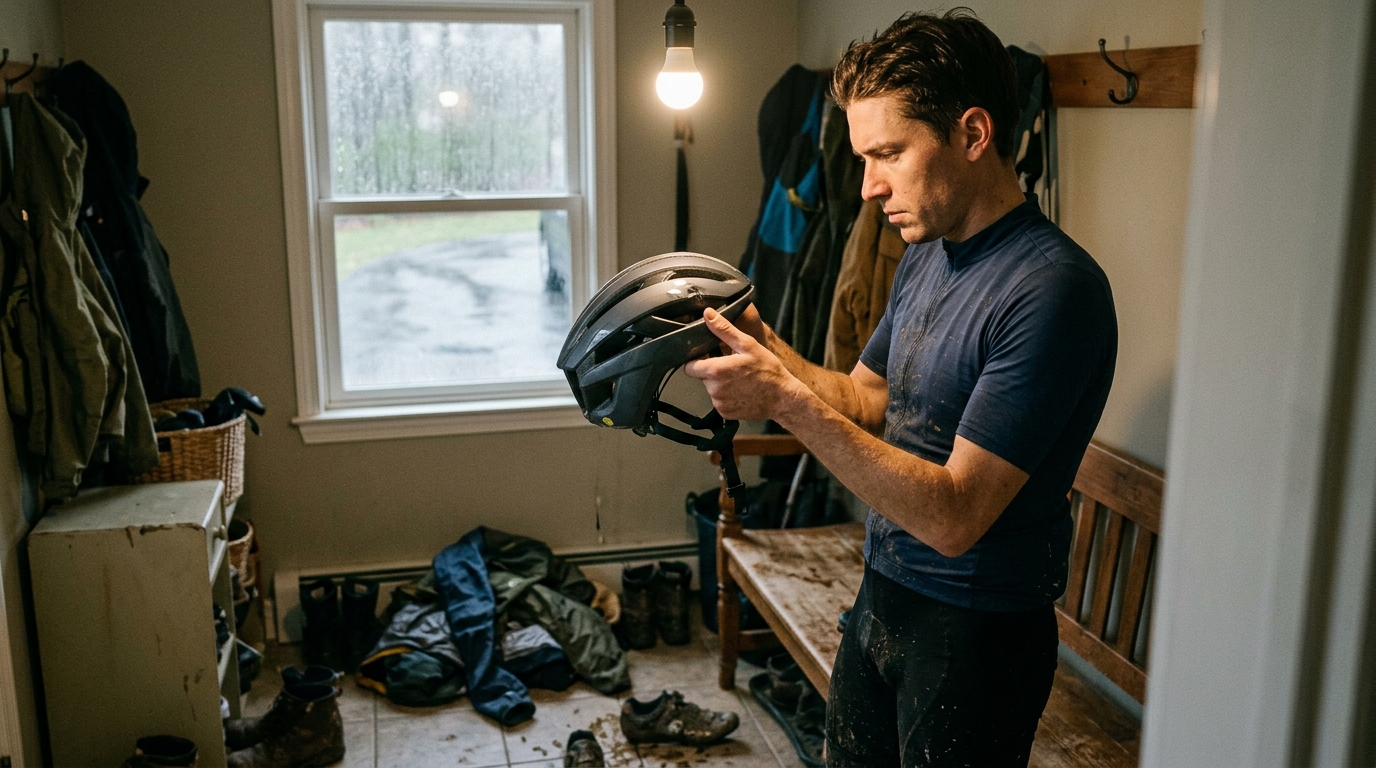
Inspection should be systematic, not casual. Do it in bright light, with the pads removed if they are removable. You are looking for damage, but also for changes in how the helmet holds together.
Foam liner
Run your fingers across the inner foam. Look for cracks, compressed patches, discoloration, dents, or any area that feels different from the rest. Pay attention to edges, vents, and strap anchor areas because damage can concentrate around transitions in the structure.
Do not press aggressively to test the foam. The goal is not to stress it further. You are checking for visible and tactile differences that suggest the liner has already been compromised.
Outer shell
Inspect the shell under direct light. Look for cracks, splits, deep scratches, bubbling, lifting, or areas where the shell is separating from the liner. Cosmetic scuffs from normal use are not the same as structural damage, but after a crash you should assume any mark near an impact zone deserves serious attention.
Also check around vents. Vents create edges, and edges can reveal cracking or shell movement earlier than smooth sections.
Straps and anchors
Pull the straps gently through their normal range. Check for fraying, cuts, stiffness, salt buildup, twisting, or uneven length. Inspect where the straps disappear into the helmet. If an anchor point looks pulled, loose, or asymmetric, that is a replacement-level concern.
Buckles and adjusters
Clip and unclip the buckle several times. It should lock cleanly and release only when intended. The strap adjusters should hold position after you set them. If the system creeps looser during a ride, it has failed a real-world fit test.
Pads
Pads are comfort parts, but they influence fit. Compressed or missing pads can let the shell move around, especially when the retention system is not enough to stabilize the helmet. Replace pads if the helmet manufacturer offers spares, but do not use new pads to hide a deeper fit or structural problem.
Cleaning and storage habits that preserve the helmet
Cleaning is not cosmetic housekeeping. It helps you see damage, keeps straps and buckles working properly, and reduces the salt buildup that slowly makes a helmet feel worse on the head.
Use mild soap and water, then let the helmet dry before storage. Avoid solvents, harsh cleaners, fuel, degreasers, and anything that could attack the shell, foam, straps, or adhesive. Avoid heat as well. A helmet should not live in a hot car, beside a heater, or anywhere it is repeatedly cooked between rides.
Store it dry, shaded, and away from heavy objects. A helmet crushed under luggage or knocked around in a boot may not have a dramatic crash story, but the material does not care how the load was applied.
What to log after a crash or near miss
After a crash, the best time to record details is as soon as you are safe and clear-headed. This log is not about turning riding into paperwork. It is about avoiding the common pattern where a rider talks themselves out of replacing damaged kit because the memory gets softer with time.
Record:
- Ride date
- Road or trail conditions
- Whether the helmet touched the ground or another object
- Where the impact occurred on the helmet
- Any visible helmet damage
- Any change in helmet fit
- Any head, neck, or facial symptoms
- Photos of the helmet from multiple angles
- Whether the helmet was retired, inspected again, or replaced
If there are symptoms after a head impact, the helmet decision is only one part of the response. Stop riding and seek appropriate medical guidance. A helmet can reduce risk, but it does not make a head impact irrelevant.
Near misses are worth logging too if the helmet was dropped hard, crushed in travel, or hit by something while off the bike. The helmet does not know whether the damage happened during a save, a slow-speed fall, or a careless moment in the garage.
How to choose a replacement without chasing gimmicks
When it is time to replace a helmet, the goal is not to buy the most complicated product you can find. The goal is to buy a helmet that fits your head, carries the relevant certification label for your market, works for your riding conditions, and will actually be worn correctly every time.
Start with fit. Different brands and models have different internal shapes. A helmet that wins every comparison but rocks on your head is the wrong helmet. Try it with your usual eyewear. If you ride in cold weather, check whether it still fits with your normal cap. If you race, check whether the helmet stays stable when you are looking down, breathing hard, and moving around on the bike.
Ventilation matters, but only in context. A highly ventilated road helmet can make sense for hot training and climbing. A more enclosed design might appeal for faster riding or poor weather, but only if it does not create fit compromises. Aerodynamics, weight, and ventilation are useful considerations after the basics are solved, not before.
Do not overvalue features you cannot connect to your actual riding. Extra adjustment range is useful if it improves fit. A magnetic buckle is useful if it works reliably for you. Integrated storage, visors, or accessories are useful only if they do not create pressure points, instability, or distraction.
The same logic applies to price. More expensive does not automatically mean better for your head. The right replacement is the one that fits securely, stays stable, suits your riding, and comes from a manufacturer with clear care and replacement guidance.
Replacement buying checklist
Before you buy, check the practical details that determine whether the helmet will work after the first ride:
- Certification label that matches your market
- Stable fit with your usual eyewear
- Stable fit with a cap if you commonly ride with one
- Retention system that tightens evenly and does not create pressure points
- Straps and buckles that hold position without slipping
- Spare pad availability from the manufacturer
- Clear manufacturer care and replacement guidance
The replacement decision rule
If you are asking when to replace bike helmet equipment, use a simple hierarchy.
Replace immediately after a meaningful impact. In practical terms, that means the helmet contacted a hard surface, was on your head during a crash where contact cannot be ruled out, or fits differently afterward. Replace when the foam, shell, straps, buckles, anchors, or retention system show structural damage or unreliable function. Replace when the helmet no longer fits securely. Replace when age, storage, sweat, and uncertainty make its condition questionable.
Do not buy a used helmet unless you fully know its history. If the seller cannot account for crashes, impacts, storage, age, and care, the apparent saving is built on information you do not have.
That may sound conservative, but it is the correct direction of error. A helmet is not a component you ride until failure. Failure is the event you are trying to avoid.
For endurance athletes who care about training consistency, that matters. The best helmet is not the one that looks fastest on a product page. It is the one that is structurally sound, correctly fitted, and trusted enough that you never think about it while riding. Once it no longer clears that bar, retire it and move on.