Image generated by our model.
brakes
Cycling Brake Setup: Rotors, Pads and Lever Feel
A practical guide to road bike brake setup, from rotor size and pad compound to lever feel, bedding-in, troubleshooting and pre-ride checks.
Why Brake Setup Matters for Speed and Safety
A good cycling brake setup is not just about stopping harder. It is about controlling speed with less hesitation and less mental load.
On the road, especially on long descents, in groups, or on technical terrain, braking is part of pacing. If the lever feel is vague, the pads bite unpredictably, or the rotors overheat, the rider starts braking earlier and more often. That costs speed before it becomes a safety problem.
A well-set-up brake system lets the rider make small speed corrections without disturbing the bike, brake hard without grabbing at the lever, and repeat both when the system is hot, wet, or being used under fatigue.
That consistency comes from matching the system to the rider and the ride. Rotor size, pad compound, lever position and hydraulic maintenance all interact. A larger rotor with glazed pads still feels poor. Fresh pads with an awkward lever reach still make descending harder than it needs to be.
The goal is not maximum braking force in isolation. The goal is usable braking force, delivered predictably, with enough heat capacity for the terrain you ride.
Match Rotor Size to the Job
Rotor size is one of the simplest ways to change brake performance, but it has to start with compatibility, not preference.
Before changing anything, check the approved rotor sizes from the frame, fork and brake manufacturer. Rotor clearance, caliper adapters and system limits matter. More brake is only useful if the parts are approved for the bike and installed correctly.
Within those approved options, a larger rotor gives the brake more leverage at the wheel and more surface area to manage heat. In practice, that usually means the same stopping force requires less hand pressure, and the system has more margin when braking is repeated.
A smaller rotor can feel sharp and light, but it gives away some thermal capacity. That tradeoff may be acceptable on flatter roads, lighter setups, or rides where braking is brief and infrequent. It becomes harder to justify when heat keeps building.
Choose the larger approved option when the ride regularly includes:
- Heavier system weight, including rider, bike, bottles and bags
- Repeated long descents
- Wet training, where braking surfaces take more abuse
- Loaded riding or bikepacking
- Persistent fade despite clean pads, good alignment and sound technique
The front brake usually deserves the first look when solving heavy lever effort or fade. Under hard deceleration, weight shifts forward and the front brake does more work. If the front system is marginal, the whole bike feels under-braked even when the rear brake is functioning normally.
This is not a judgement about fitness or skill. It is physics. The brake does not care how strong the rider is. It cares how much energy it has to absorb and how quickly it can shed heat.
Choose Pad Compounds for Heat, Modulation and Wet Conditions
Pads shape the personality of the brake. Two bikes can run the same calipers and rotors but feel completely different because the pad compound changes bite, noise, wet-weather behavior and heat resistance.
There are three useful questions to answer.
Do you need modulation or heat resistance?
Softer-feeling pad compounds often give excellent initial control. They can feel quieter and easier to feather, which is valuable on road descents where small speed corrections matter. The tradeoff is that they may wear faster or struggle more when heat builds.
More heat-resistant compounds tend to suit heavier system loads, long descents, wet conditions and high-load riding. They can feel firmer at the lever and may need more deliberate bedding-in, but they usually provide a wider margin when the brake is being worked hard.
This is where riders often make the wrong decision. They chase a pad that feels good in one hard stop, then find it inconsistent on a descent. The better test is how the brake feels after repeated braking, when the rotor and pad are hot.
How often do you ride in the wet?
Wet-weather braking asks more of the pad. Water, road film and grit sit between the pad and rotor until the system clears them. A pad that works cleanly in dry summer conditions may feel delayed, noisy or abrasive through winter.
If you train regularly in rain, prioritize consistency and durability over silence. Some noise in bad conditions is less important than a brake that bites predictably after the first lever pull.
Are your pads matched to your rotors?
Not every rotor is designed for every pad compound. Some rotors are restricted to specific pad types. Ignore that and you can end up with poor braking, accelerated wear or unwanted noise.
Before fitting new pads, check rotor markings and component guidance. The best pad is not the best pad in theory. It is the best pad that works with your rotor, caliper and riding demands.
Set Lever Reach, Bite Point and Hood Position Correctly
Lever feel is where brake setup becomes rider setup.
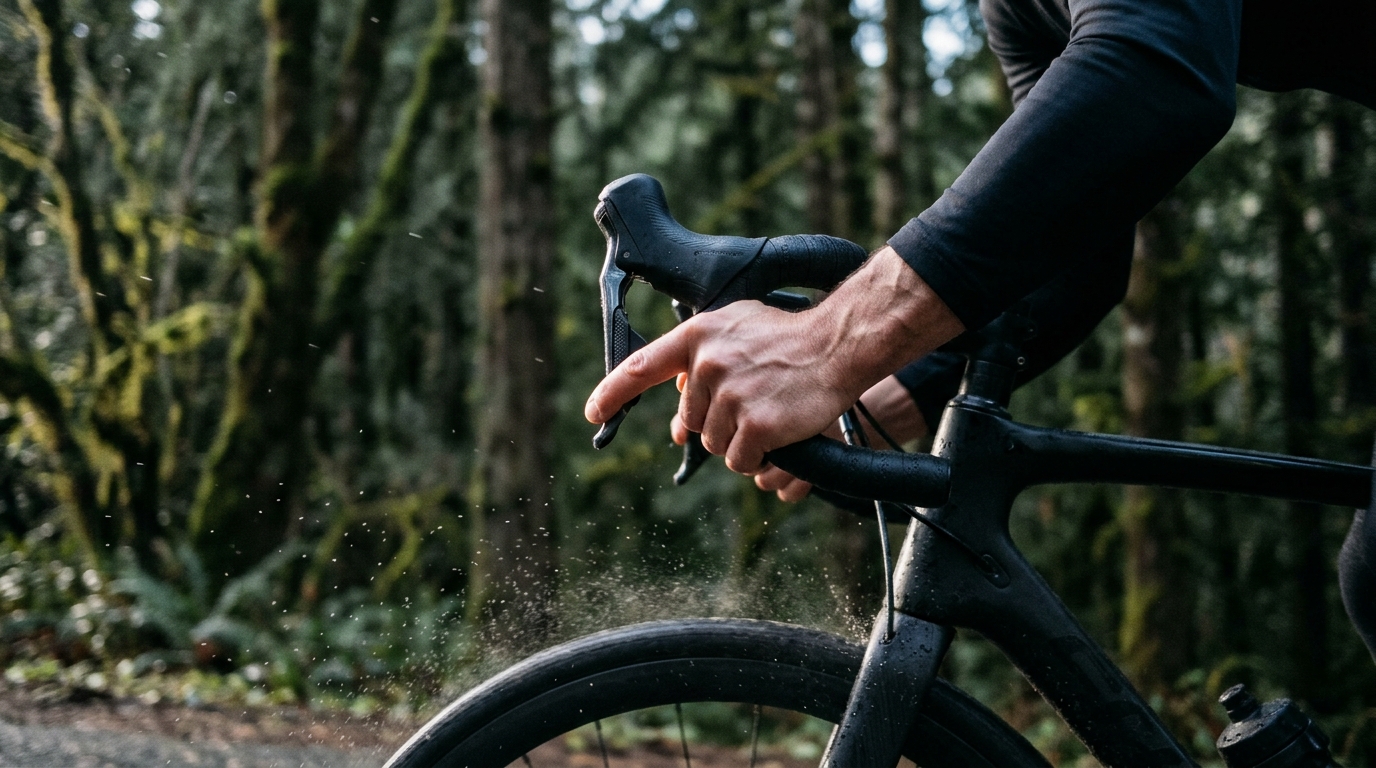
A powerful brake is still compromised if the lever sits too far away, bites too close to the bar, or forces the wrist into a weak position. The rider should be able to brake from the hoods with a relaxed hand and from the drops with secure leverage.
Lever reach
Reach is the distance from the bar to the lever blade. If it is too far, braking becomes a stretch, especially from the drops. That reduces control and encourages the rider to grab rather than modulate.
Set reach so the first braking finger can pull the lever while the hand stays wrapped around the bar. The wrist should not have to rotate aggressively inward or downward to find the lever.
Bite point
Bite point is where the pads first contact the rotor and braking force starts to build. If the bite point is too late, the lever can feel alarming, even if the brake is technically powerful. If it is too early or abrupt, fine control suffers.
Some systems allow bite point adjustment. Others rely more on pad thickness, caliper alignment and a clean hydraulic system. If the lever pulls close to the bar, feels spongy, or changes position during a ride, treat that as a maintenance signal, not a preference.
Hood position
Hood angle changes braking leverage. Hoods rolled too far forward can make it harder to brake from the hoods because the hand sits behind the lever. Hoods rotated too high can shorten the cockpit feel and overload the wrist.
The right position lets the forearm, wrist and hand form a strong line when braking. This matters most late in hard rides, when grip strength and focus drop. Poor hood position can make good brakes feel worse than they are.
Bed In Pads and Rotors Without Glazing Them
Bedding-in creates a consistent transfer layer between pad and rotor. Skip it and the brake may feel weak, noisy or uneven. Do it badly and the pads can glaze, leaving a hard, shiny surface that reduces friction.
Manufacturer procedures vary by pad compound and brake brand, so follow the component maker's bedding instructions where they are available. The general principle is still the same: build heat progressively, then let the system cool.
Start with controlled accelerations and firm, smooth braking. Do not come to a complete stop with the lever clamped if you can avoid it, because that can deposit pad material unevenly in one spot. Repeat until the brake feel becomes stronger and more consistent.
Then let the brakes cool before judging the result. A brake can feel different when hot during bedding than it does once the material has stabilized.
The common mistake is dragging the brake lightly for too long. That can create heat without enough pressure, which encourages glazing rather than a clean transfer layer. Another mistake is taking fresh pads straight into a long descent. New pads need preparation before they are asked to manage real heat.
If new pads still feel weak after proper bedding, do not just brake harder and hope. Check contamination first, then caliper alignment, rotor condition and pad compatibility.
Diagnose Brake Problems in the Right Order
Brake problems are easier to solve when you separate lever feel, braking power, heat behavior and rotor alignment. Random part swapping usually hides the cause rather than fixing it.
Use the symptom as the starting point, then inspect the most likely causes in order.
| Symptom | Likely causes | What to inspect first |
|---|---|---|
| Spongy lever | Air in the hydraulic system, old fluid, hose or fitting issue | Lever feel with the bike still, then bleed condition and visible leaks |
| Late bite point | Pad wear, caliper piston position, air in the system | Pad thickness, then caliper centering, then hydraulic bleed |
| Squeal | Contamination, glazing, wet grit, incompatible pad and rotor pairing | Rotor cleanliness, then pad surface, then compound compatibility |
| Weak power | Poor bedding, contamination, glazed pads, underspecified pad compound | Bedding status, then rotor and pad contamination, then compound choice |
| Fade | Heat overload, continuous dragging, pad compound limit, rotor heat capacity, hydraulic issue | Braking technique, then pad compound, then approved rotor size, then bleed |
| Pulsing | Warped rotor, uneven pad transfer, rotor damage, loose hardware | Rotor trueness, then rotor surface, then rotor bolts or lockring |
| Persistent rub | Caliper misalignment, sticky piston, bent rotor, axle not seated | Wheel seating, then caliper alignment, then piston movement, then rotor trueness |
If the lever feels soft or spongy
Start with the simplest check: squeeze the lever firmly while the bike is stationary. A healthy hydraulic system should feel consistent and should not slowly creep toward the bar.
Then inspect pad thickness. Worn pads can move the bite point later and make the system feel worse even when the hydraulics are sound.
If pad thickness is fine and the lever still feels soft, suspect air in the system or a hydraulic issue. Check for fluid at the lever, hose and caliper, then bleed according to the brake manufacturer's procedure. Do not try to solve a spongy lever with rotor or pad changes.
If braking power is poor
First ask whether the lever feels normal. If lever travel is stable but power is weak, the problem is usually at the pad and rotor interface.
Inspect the rotor for oily film and the pads for glazing or contamination. Cleaning the rotor is often straightforward, but contaminated pads may need replacement if noise or weak power remains.
Next, revisit bedding. New pads that were never bedded properly often feel dull and inconsistent. If the brake was bedded correctly and remains weak, check whether the pad compound is appropriate for the rotor and the riding load.
If the brake fades on descents
Fade is not one problem. It is the system telling you heat is exceeding the available margin.
Start with technique. Continuous light dragging keeps heat in the rotor and pads. More decisive braking followed by release gives the system more chance to cool through airflow.
Then look at the pad compound. If the lever feel remains firm but stopping power fades, the pad and rotor interface may be overheating. A more heat-resistant pad can be the right move if it is approved for the rotor.
If fade persists, look at rotor size within the approved range from the frame, fork and brake manufacturer. Heavier system weight, loaded riding, wet training and repeated long descents all push the case toward the larger approved option. If the lever itself changes feel under heat, include a hydraulic bleed in the diagnosis.
If the brakes are noisy after cleaning
Noise after cleaning is often contamination until proven otherwise.
First, think about what touched the bike. Degreaser, chain lubricant, polish, overspray and dirty rags can all reach the rotor. Clean the rotor with an appropriate brake-safe cleaner and a clean cloth.
Second, inspect the pads. If they look shiny, smell oily, or keep squealing after the rotor is clean, remove them and assess whether they are glazed or contaminated. Light glazing may sometimes be corrected according to manufacturer guidance, but oil contamination often means replacement.
Third, separate drivetrain cleaning from brake cleaning next time. Cover rotors when using sprays, avoid touching the braking track, and keep brake-specific cloths away from chain-cleaning tools.
If braking pulses
Pulsing usually points to the rotor, the braking surface, or the hardware holding it in place.
First, spin the wheel and watch the rotor pass through the caliper. If the rotor moves side to side, true or replace it according to the manufacturer's guidance.
Second, inspect the braking track. Uneven pad transfer, scoring or heat damage can create a grab-release sensation even if the rotor is straight.
Third, check the rotor bolts or lockring and confirm the wheel is properly seated. A loose or poorly seated interface can mimic a rotor problem.
Spot Contamination, Fade and Rotor Wear Early
Most brake problems announce themselves before they become dangerous. The key is reading the symptoms early.
Contamination
Contaminated pads often squeal, feel grabby, or lose power despite normal lever travel. Usual sources include chain lubricant, degreaser, road spray, cleaning products or dirty hands during maintenance.
Once oil gets into pad material, it can be difficult to recover. Cleaning the rotor is straightforward, but pads may need replacement if braking remains noisy or weak.
Fade
Fade is a loss of braking performance under heat. It can feel like the lever requires more force for the same deceleration, or that the brake has gone dull after repeated use.
There are two broad causes. The pad and rotor interface can overheat, or the hydraulic system can struggle if fluid condition or air contamination is poor. Either way, fade means the setup is being pushed beyond its useful margin.
The fix may be better braking technique, a different pad compound, a larger approved rotor, a bleed, or a combination of those changes.
Rotor wear and damage
Rotors wear over time and can be damaged by heat, impact or poor pad compatibility. Signs include pulsing, visible scoring, rubbing that returns after alignment, or a braking track that looks uneven.
Check the wear limit printed on the rotor or provided by the manufacturer. Do not guess. A rotor that is below its limit is not a tuning issue. It is a replacement part.
Build a Simple Brake Check Routine Before Key Rides
A brake routine should be quick enough that you actually do it. Before key rides, races, big descents or travel, run through the same sequence.
The practical pre-ride check
- Squeeze both levers firmly and confirm the bite point feels normal
- Spin each wheel and listen for rotor rub
- Look through the caliper to confirm pad material remains
- Check that rotors are clean and free from oily film
- Confirm thru-axles or quick releases are properly secured
- Roll slowly and test both brakes before the ride starts
That short routine catches most obvious failures: a soft lever, a misaligned wheel, worn pads, a contaminated rotor, or a brake that was disturbed during transport.
For hydraulic disc brake maintenance, add a deeper check when lever feel changes. A healthy system should feel consistent. If the lever slowly pulls farther in, feels spongy, or changes after the bike is stored or transported, investigate before the next important ride.
What to Change First
Do not replace parts randomly. Work through the system logically.
If lever travel is the issue, inspect pad wear, caliper position and hydraulic condition. If power is the issue, inspect contamination, bedding and pad compound. If heat is the issue, consider braking technique, pad choice and approved rotor size. If comfort is the issue, adjust reach, hood position and bar setup.
Good brake setup is the result of matching the system to the rider, then keeping it clean and consistent. The payoff is not just safer stopping. It is later braking, calmer descending and fewer small corrections that waste speed.
The faster rider is often not the one who brakes the hardest. It is the one who trusts the brake enough to use it precisely.