Image generated by our model.
bike lights
Bike Light Setup for Day and Night Road Rides
A practical bike light setup guide for serious road cyclists covering visibility, beam choice, mounting, runtime, and group ride etiquette.
Why serious cyclists need lights beyond the legal minimum
A good bike light setup is not just about ticking the legal box. For road cyclists who ride early, finish late, train in traffic, or spend long rides on exposed roads, lights are part of the performance system. They reduce uncertainty for drivers, give other riders more time to read your position, and make your own pacing and line choice less dependent on perfect conditions.
The legal minimum is usually designed around basic compliance, and the details vary by country, region, and road type, so check your local requirements before treating any setup as road legal. Once that baseline is covered, the better question is whether your lights are useful in the conditions you actually ride. A light that technically qualifies may still be easy to miss from the wrong angle, weak in bright conditions, or too narrow to signal your position early enough.
Serious cyclists tend to think carefully about tyres, gearing, clothing, nutrition, and data. Road bike lights deserve the same treatment because they influence the ride before anything goes wrong. The best setup is not the brightest possible combination. It is the setup that makes you predictable, visible, and able to see the road without annoying the people around you.
Front and rear lights solve different problems
Front and rear lights are not interchangeable tools. They solve different visibility problems.
A front light has different jobs depending on conditions. During the day, it helps oncoming traffic identify you as a moving cyclist rather than background road clutter. At night, it also has to illuminate the surface well enough for you to ride at speed. Those are related, but not identical. A daytime front light can use an attention-grabbing pulse. A night front light needs a controlled beam that puts useful light on the road without throwing glare into drivers' eyes.
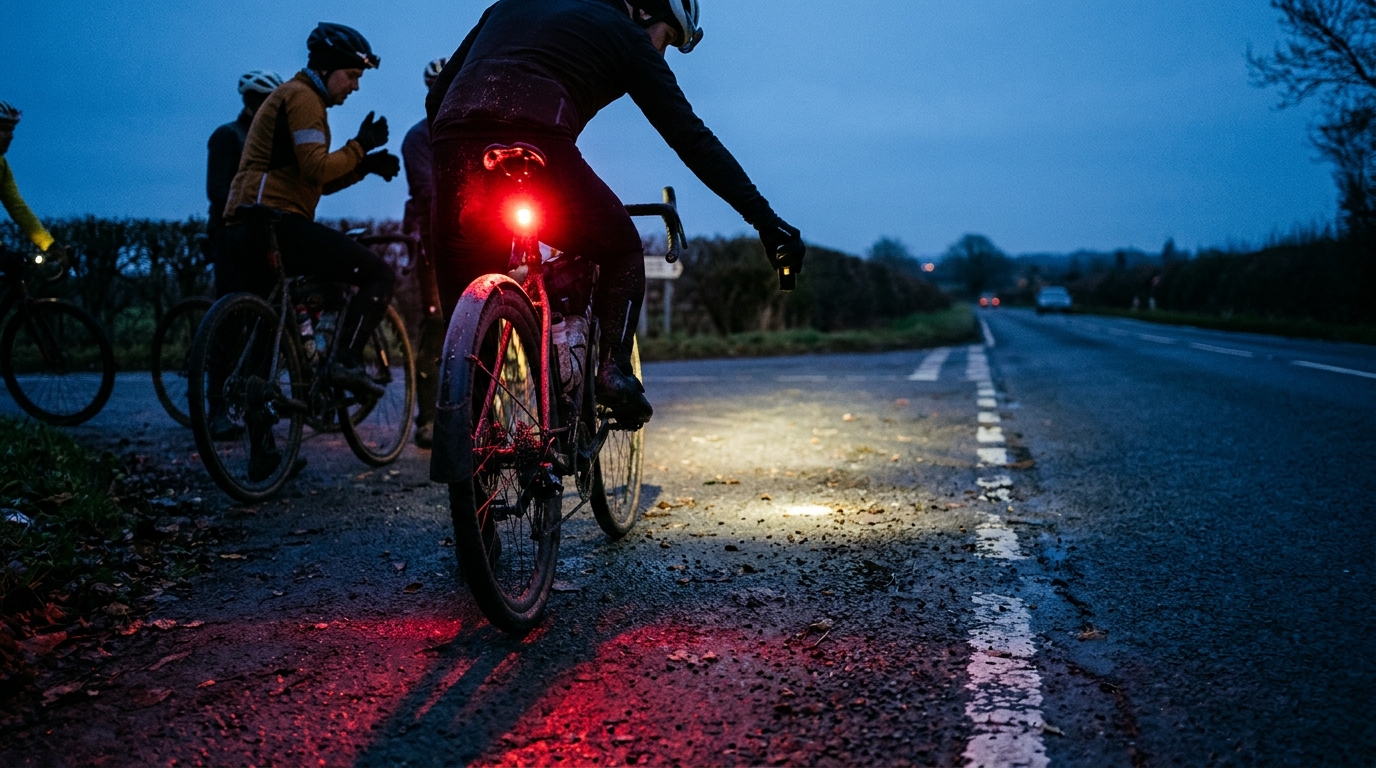
A rear light is mainly about position and distance. It tells approaching traffic where you are, how far left or right you are placed, and whether you are moving steadily or changing speed. For cycling safety lights, the rear unit is often the more important daytime tool because overtaking traffic is one of the main external risks on the road.
That means a balanced bike light setup usually looks like this:
- A front light with enough output and beam control for the conditions you actually ride in
- A rear light with strong visibility from behind and from the rear quarter angles
- Modes that can be changed quickly between daylight, dusk, night, and group situations
- Mounts that hold position over rough surfaces and do not interfere with your computer, bags, or hands
The key is matching each light to its job rather than buying the highest advertised bike light lumens and assuming the problem is solved.
Lumens, candela and beam pattern: what actually matters
Bike light lumens get most of the marketing attention because the number is simple. More lumens means more total light output, but total output does not tell you where the light goes. For a cyclist, placement of light is often more important than the headline figure.
Candela describes intensity in a direction. Beam pattern describes how that intensity is distributed. A road light with a controlled beam can make the lane ahead clearer while producing less wasted glare. A poorly shaped beam can feel bright when you look at it in your hand but disappoint once it is mounted on the bike.
For night road riding, the beam should give you:
- A clear central field far enough ahead to choose a line
- Usable spill to reveal the road edge, debris, and corner entries
- A cutoff or controlled shape that limits glare for drivers and other riders
Daytime running lights solve a different problem. The goal is not to light the road. The goal is conspicuity. A compact light with a well-designed flash pattern can be more effective than a broad low-contrast glow because it separates you from the visual noise of traffic, shop fronts, reflective signs, and patchy shade.
This is where riders often make a poor trade. They buy one very bright front light, run it in a harsh flash mode everywhere, and assume visibility equals safety. In reality, an aggressive mode that works well on an open road in daylight can be distracting in a group, irritating at dusk, and actively unhelpful at night if it prevents others from judging your position smoothly.
The practical rule is simple: output matters, but control matters more.
Daytime flash vs steady night mode: when to use each
Daytime flash exists to be noticed. It works best when ambient light is high and drivers have plenty of other visual information competing for attention. On bright roads, in tree shade, near junctions, and on rolling terrain where your silhouette appears and disappears, a daytime flash can make your presence easier to register.
At night, steady mode usually becomes the default for the front light. Your eyes and the eyes of others need continuity. A pulsing front beam can make it harder to judge road texture, closing speed, and your exact position. It can also be brutal for riders coming the other way or sitting near you in a bunch.
Rear lights are more nuanced. A rear flash can be useful after dark, but the mode should not be so violent that it dazzles the rider behind or makes distance harder to judge. Many rear lights have softer pulse modes that preserve visibility without creating the strobe effect that makes group riding worse.
A good mode strategy looks like this:
Bright daylight
Use daytime-specific flash or pulse modes front and rear. Prioritize being picked out early by traffic. Angle the front light so it is visible without pointing directly into drivers' eyes at close range.
Dusk, dawn, and heavy shade
Move toward lower intensity or steadier modes. This is the transition zone where glare begins to matter more. Drivers can still miss you, but other road users are also more sensitive to direct light.
Full night solo riding
Use a steady front beam for road vision. Use a rear mode that is visible but not erratic. If the road is unlit and fast, your front setup has to support decision-making, not just visibility.
Full night group riding
Reduce intensity, avoid sharp front flashing, and be careful with high-output rear modes. The rider behind you should see you clearly without having their night vision degraded.
Setup templates for common rides
The best light setup changes with the ride. These templates are deliberately qualitative because verified lumen and runtime figures vary by light, battery age, temperature, and mode. Use them as a decision structure, then adjust to your actual equipment.
| Ride condition | Front mode | Rear mode | Mounting priority | Battery margin |
|---|---|---|---|---|
| Bright solo daytime road ride | Daytime pulse or flash that is visible without being blinding | Daytime pulse with strong rear and rear-quarter visibility | Front centered and aimed slightly down, rear high and unobstructed | Enough reserve for delays, shade, weather changes, and a later finish |
| Dusk commute or training ride | Lower intensity pulse or steady mode as light fades | Softer pulse or steady mode that remains easy to judge | Prioritize glare control and clear rear visibility around bags or clothing | More margin than the planned ride requires because dusk can turn into full dark quickly |
| Unlit night ride | Steady controlled beam for road detail | Visible steady or gentle pulse | Front aim and stability become critical, rear must be straight and unobstructed | Conservative mode choice with backup capacity for mechanicals or route changes |
| Group ride | Steady or low-glare front mode when near other riders | Soft pulse or steady mode | Avoid eye-level rear glare and front beams aimed into faces | Enough margin to avoid switching to disruptive emergency modes late |
The logic is the same across all of them. Pick the mode for the risk that matters most, then mount the light so that mode can actually do its job.
How to aim your bike lights before the ride
Beam aim is not a detail. It is the difference between useful visibility and wasted glare. A light can be powerful, fully charged, and mounted neatly, yet still fail if it points at the wrong place.
A simple pre-ride aiming process works:
- Mount the lights exactly as you will ride them, with bags, computer, mudguards, and clothing in place
- Point the front light at a wall, garage door, or quiet road surface and turn on the mode you expect to use
- Confirm the brightest part of the front beam lands on the road ahead, not at eye level
- Check that the beam gives usable road detail without throwing a harsh hotspot upward
- Bounce the bike lightly or roll over rough ground and make sure the beam does not shake out of position
- Stand behind the bike and confirm the rear light is straight, high enough to be seen, and not blocked by a saddle bag or jacket
- Have another rider, or someone standing at driver height, check rear visibility from directly behind and from rear-quarter angles
That last check is important because most real-world traffic does not approach from a perfect straight line. If the rear light disappears from a shallow angle, the setup is weaker than it looks in the garage.
Best mounting positions for visibility and clean ride data
Mounting is where many otherwise good road bike lights fail. A light is only as effective as its line of sight.
The cleanest front setup is usually centered on the bike, either on the bar or beneath an out-front computer mount if the mount and light are designed for it. Center mounting makes the beam easier to aim and gives approaching traffic a clear reference point. It also keeps the cockpit organized, which matters when you are using a head unit, shifting under load, eating, or riding in gloves.
If you run a front light under the computer, check that it does not block the head unit buttons, interfere with charging cables, or vibrate enough to distort the beam. A loose light is not just annoying. On dark descents or rough roads, a bouncing beam makes the surface harder to read.
Rear lights work best when they are high, straight, and unobstructed. Seatpost mounting is common, but it can be compromised by a saddle bag, long jacket, low seatpost exposure, or deep-section seatpost shapes. Saddle-rail mounts can be cleaner if they place the light in a clear line behind the rider. The key is not the mount style, but the view from behind.
Before trusting the setup, stand behind the bike and check it like a driver would see it. Then check it from the rear quarter angle, because not all traffic approaches perfectly in line. A light hidden by a saddle bag or pointed at the ground may still look fine from above when you clip it on, but it is not doing the job on the road.
If you use a radar rear light, placement becomes even more important. It needs a clear rearward view and a stable mount. Poor alignment can reduce its usefulness and create false confidence. The same logic applies to any connected light system that talks to your head unit. Clean data starts with clean mounting.
Battery runtime planning for long rides and group rides
Battery planning is not just about whether the light turns on at the start. The mistake is assuming the stated runtime will match the ride. Temperature, mode choice, battery age, charging habits, and stop-start use all affect how much margin you really have.
For long rides, build the light plan around the worst likely section, not the average conditions. If the late part of the ride could be in fading light, the lights need to be strong then, not merely alive. A front light that has dropped into a low-power emergency mode at the moment you need road detail is not a plan.
Practical runtime planning:
- Start with fully charged lights, not lights that seemed fine after the last ride
- Choose modes based on the full ride duration, not the opening section
- Carry a small backup rear light on long or remote rides
- Know whether your light can run while charging if you use an external battery
- Check battery indicators before rolling, not after the coffee stop
- For group rides, assume the ride may go longer than advertised
Battery management is also a pacing issue. A rider comfortable using power targets already understands that a system has limits. Lights are the same. Running maximum output because it feels reassuring early can leave you under-equipped later. The best bike light setup has enough reserve to handle delays, mechanicals, route changes, and bad weather.
Group ride etiquette: be visible without blinding others
Group rides create a different lighting problem. The goal is no longer just making yourself visible to cars. It is also preserving the vision and comfort of the riders around you.
The most common errors are a front light angled too high and a rear light running an aggressive flash in the face of the rider behind. Both are avoidable. If someone sitting on your wheel has to look away from your rear light, it is too intense for that context. If riders coming toward you are shielding their eyes, your front beam needs to come down or change mode.
Good group etiquette:
- Use a steady or softer pulse rear mode when riders are close behind
- Angle the front light down enough to illuminate the road, not faces
- Avoid high-intensity flash modes inside the bunch
- Do not mount a rear light where it shines directly at eye level from close range
- Tell the group if your light is failing or you need to stop to change mode
This is not about being less safe. It is about using the right tool for the environment. A mode that is ideal for a solo rider on an exposed road can be the wrong mode in a tight paceline. Visibility has to serve the ride, not dominate it.
Pre-ride and maintenance checklist for reliable lights
Lights should be part of the same pre-ride routine as tyres, drivetrain, bottles, and route. The check takes very little time, but it prevents the most common failures.
Before every ride
- Confirm front and rear lights turn on
- Check the selected modes suit the ride conditions
- Verify battery status
- Confirm mounts are tight and lights are aligned
- Make sure bags, clothing, and mudguards do not block the rear light
- Check that the front beam does not interfere with the head unit view
- If using connected lights, confirm they pair correctly before leaving
After wet or dirty rides
- Wipe lenses so the beam is not dulled by road film
- Dry charging ports before plugging in
- Inspect rubber covers and seals
- Check mounts for grit, wear, or looseness
- Recharge before storing the bike
Periodically
- Test backup lights
- Inspect straps and brackets for cracking
- Confirm the light still holds charge well enough for your normal rides
- Recheck beam aim after changing bars, saddle height, bags, or mounts
The strongest setup is the one that works automatically because the habits are built in. If you only think about lights when conditions are already bad, the setup is reactive. Serious road riding rewards the opposite approach.
Quick decision table for bike light setup
| Conditions | Front light approach | Rear light approach | Key risk |
|---|---|---|---|
| Bright daytime traffic | Use a conspicuous pulse with controlled aim | Use a strong daytime pulse visible from behind and rear-quarter angles | Blending into visual clutter |
| Dusk or dawn | Shift toward lower glare and steadier light | Use a visible but less aggressive mode | Being missed by drivers while also creating glare |
| Unlit roads | Use a steady beam that shows road detail | Use a steady or gentle pulse that remains easy to judge | Outriding the beam or losing road surface detail |
| Wet or dirty roads | Prioritize beam control and clean lenses | Keep the lens clean and placement unobstructed | Light scatter, road spray, and reduced contrast |
| Group riding | Avoid sharp front flash and over-aimed beams | Use a soft pulse or steady mode | Blinding riders and making distance harder to judge |
The bottom line on bike light setup
A good bike light setup is not about maximum brightness. It is about putting the right kind of light in the right place, using the right mode for the conditions, and preserving enough battery to still be effective when the ride changes.
For daytime running lights, prioritize conspicuity and angle. For night riding, prioritize beam control, road detail, and courtesy. For group rides, reduce glare and make your position easy to read. For long rides, manage runtime with the same seriousness you bring to pacing and fueling.
Road bike lights are small pieces of equipment, but they shape how others read your presence on the road. Set them up deliberately and they become part of a safer, cleaner, more reliable ride system.